Sculpt OS is a desktop operating system based on Genode framework. The interesting thing about it is that it uses virtualization and microkernel architecture to isolate all of its components. As described in the official tutorial:
However, even if neither trusting one particular software provider nor the integrity of the download, one can still install and use the provided software without risk as long as one does not explicitly grant the untrusted components access to sensitive parts of the system.
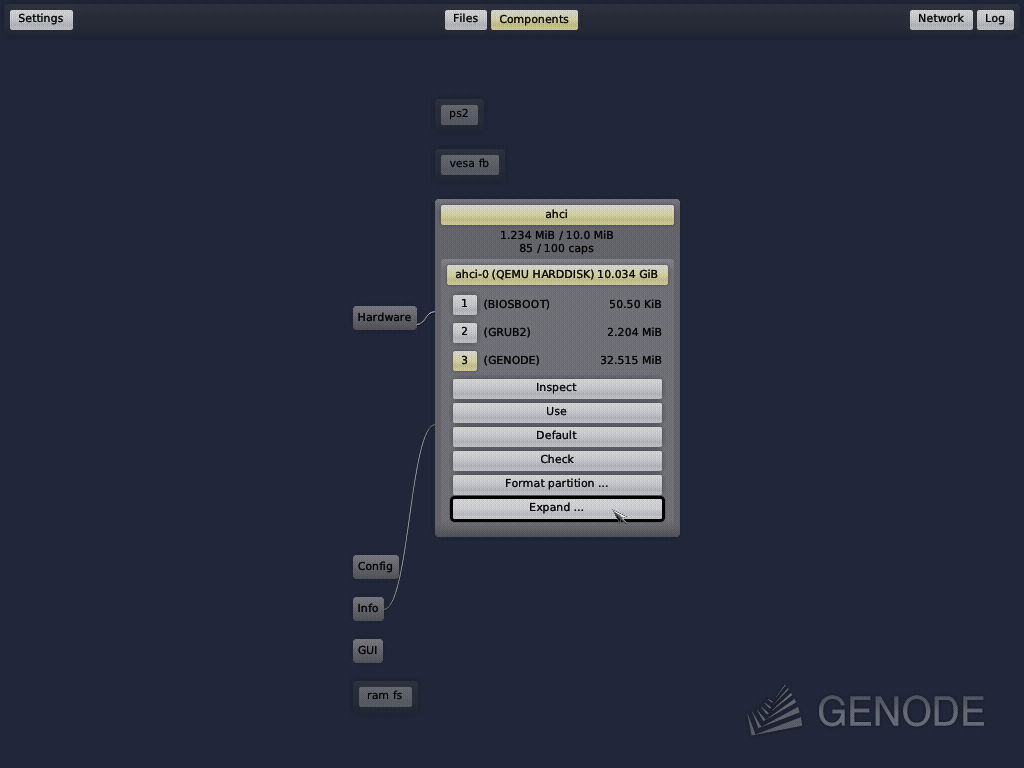
Official tutorial suggests using "ram fs". I tried using ram fs at first, but even with 6 GB of RAM allocated it was not sufficient to try anything interesting, so I will skip this and start with setting up a disk image.
Disk images can be found in the download section of the website.
Original disk image can be downloaded by running wcurl https://genode.org/files/sculpt/sculpt-25-10.img.
It is a bootable image.
To run with QEMU
I installed necessary packages by running pacman -S qemu-ui-gtk qemu-system-x86 qemu-img.
qemu-img convert -f raw -O qcow2 sculpt-25-10.img sculpt-25-10.qcow2
qemu-img resize sculpt-25-10.qcow2 +10G
Boot it with
qemu-system-x86_64 -drive file=sculpt-25-10.qcow2 -display gtk -accel kvm -cpu host -m 4000 -machine q35
Screenshots can be made by opening QEMU monitor with Ctrl+Alt+2 and then using screendump 1.png -f png command.
Afterwards, switch to the OS with Ctrl+Alt+1.
After expanding the partition, click on "Default". This sets the partition as default and also automatically enables "Use". Also click "Network" and then "Wired" in the top right corner to enable the network. The result is in screenshot below:
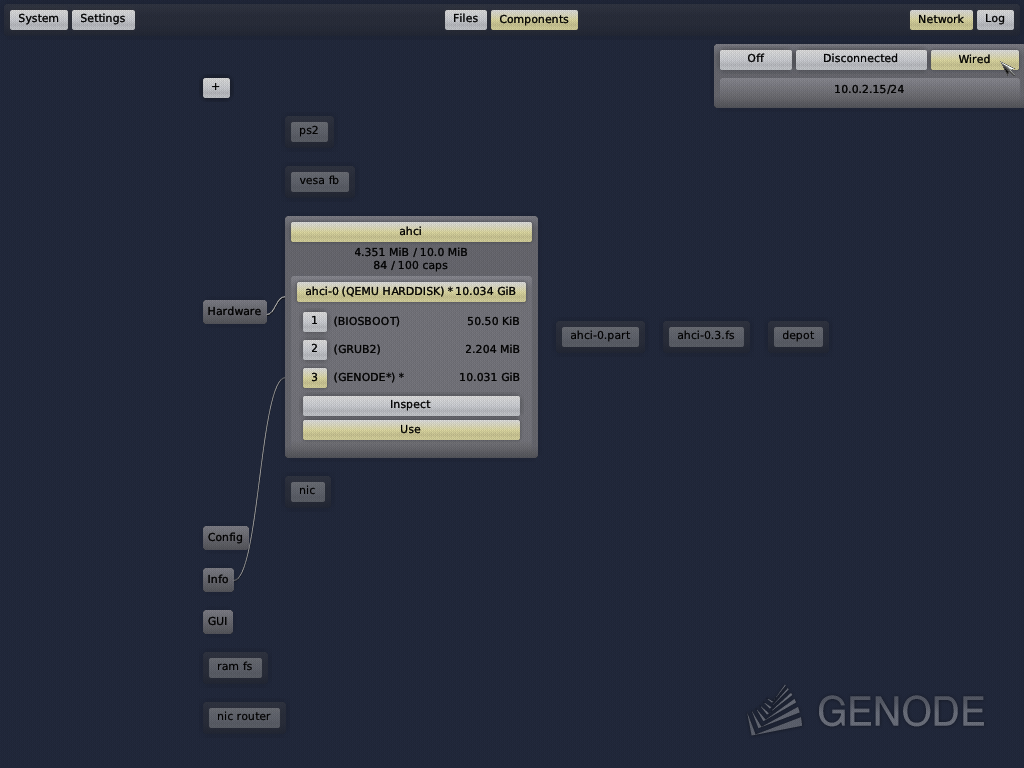
With GENODE partition in use and network enabled
it is possible to install components by clicking "+".
Official tutorial explains how to setup window manager and shell manually,
but it is easier to click on "System", then "Presets" and then select "window manager".
Once the window manager is enabled, press F12 to get to the system shell. To persist current changes, run in the shell:
mkdir -p rw/config/25.10/
cp config/managed/deploy rw/config/25.10/
Afterwards, if you press F12 again and go to System, then Power, then select "Hard reboot" and Confirm, you will get back into the window manager.
Next time to save the state after adding more components it is enough to type cp config/managed/deploy rw/config/25.10.
The network has to be enabled again each time.